

Checking your blood sugar is crucial for managing diabetes, but it doesn’t have to be painful. With the right tools and techniques, you can make the process quick and easy—just like any other daily routine.
1: Optimize Your Tools
- Lancet Selection: Always use a fresh lancet for each test. A sharp lancet pierces the skin more easily, reducing discomfort.
- Lancing Device: Choose an adjustable device with depth settings. This helps minimize the needle’s entry while getting enough blood.
2: Prepare Your Fingers
- Warm Up: Increase blood flow by warming your hands. Rub them together, wash with warm water, or tuck them into your pockets for a few minutes before pricking.
- Dry Well: Ensure your hands are dry to prevent diluted blood samples and inaccurate readings.
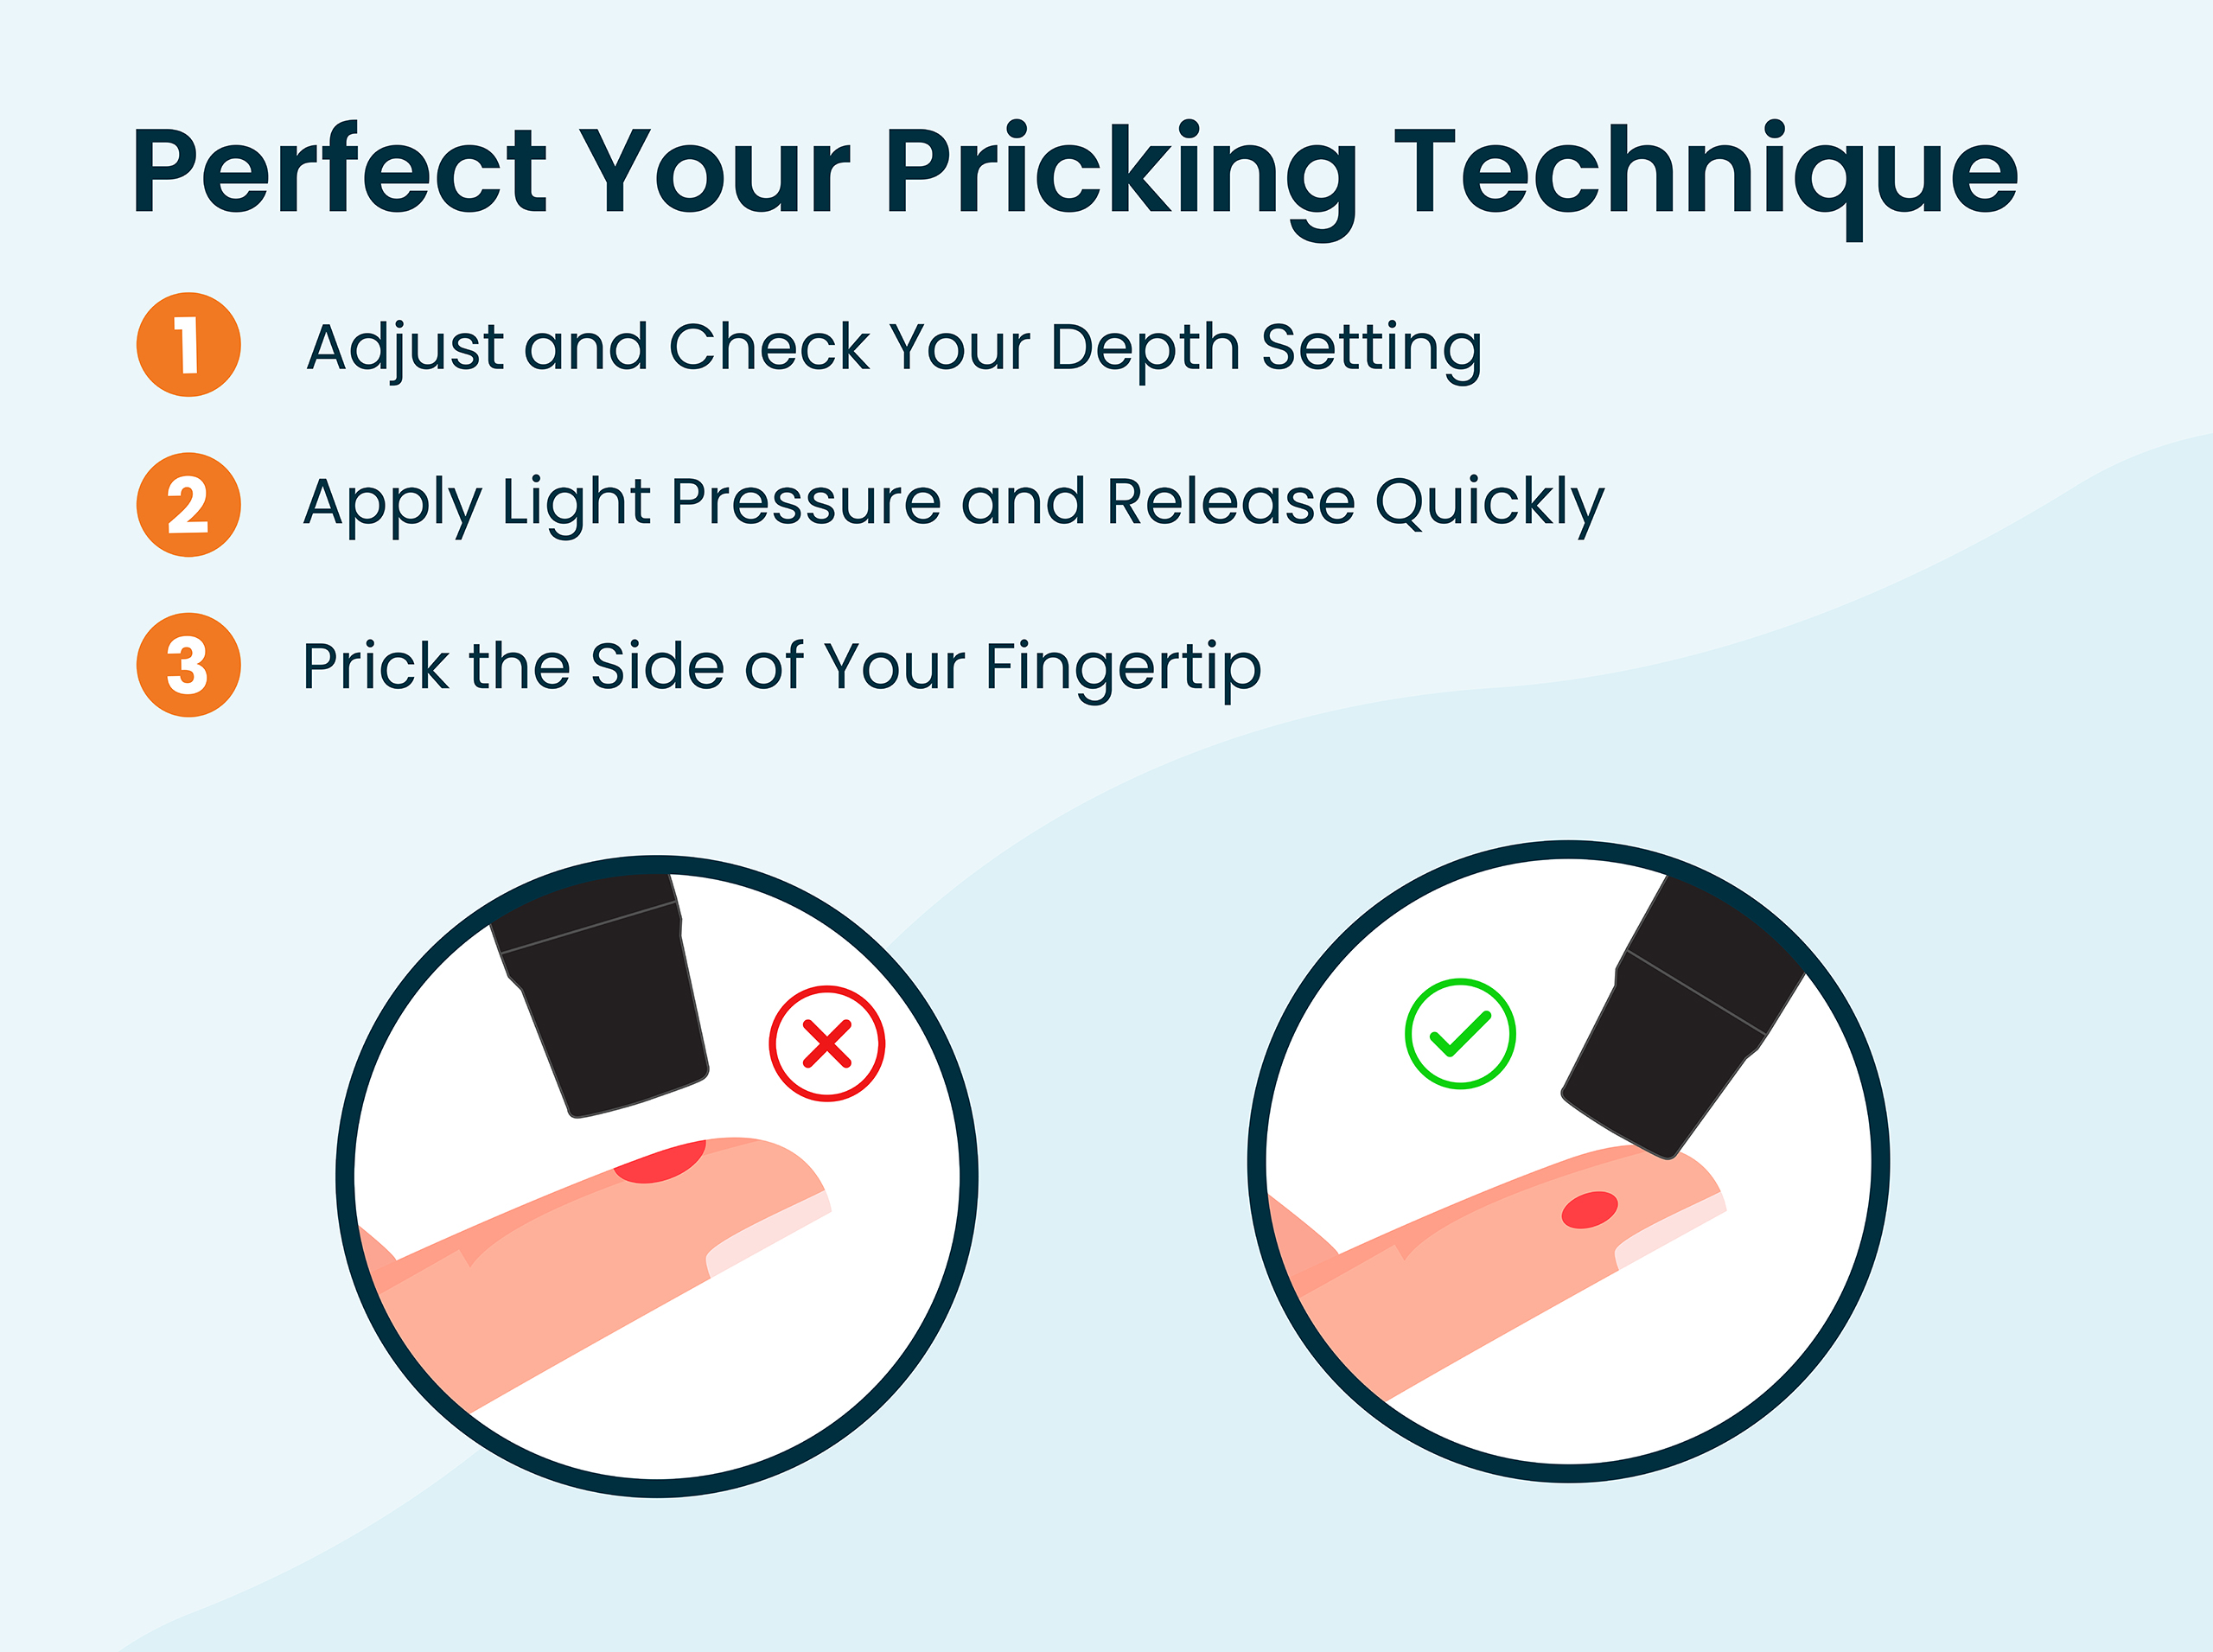
3: Perfect Your Pricking Technique
- Depth Setting: Set the lancing device to the shallowest depth that still provides enough blood for a reading.
- Gentle Touch: Apply light pressure with the lancing device and release quickly for a more comfortable experience.
- Side-Pricking: Prick the side of your fingertip, avoiding the more sensitive pad area.
- Finger Rotation: Rotate between the right and left sides of your fingers weekly to allow each side time to heal. Rotate fingers with each test to allow healing. Use your non-dominant hand to distribute pricks across all ten fingers, giving each one time to recover.
- Gentle Squeeze: After pricking, gently squeeze your finger to extract blood. Avoid squeezing too hard, as this can mix interstitial fluid with your blood and skew the results.
4: Aftercare
- Apply Pressure: Press the site after blood collection to stop bleeding.
- Skin Care: Regularly moisturize your fingers to keep your skin healthy and prevent calluses.
Additional Tips
- Stay Hydrated: Hydration not only makes blood sampling easier but can also help regulate blood sugar levels—a double win!
- Relaxation: Take deep breaths before testing to relax and minimize discomfort.
Sending Health Your Way!
The Tula Clinical Team
Reviewed by:
Aubree RN, BSN
Austin MS, RDN, CSR, LDN, CD
Tula Takeaways |
|---|
| 1. Lancet Device Settings: Check your depth settings and make sure you have a fresh lancet with each new finger prick to help minimize the pain. |
| 2. Remember Your Goals: Focusing on your health goals can help to stay motivated in managing your blood sugar. |
| 3. Take Turns: Try rotating which fingers and sides of fingers you are pricking to space out how much you pick on a certain finger and spot. |


The LIVE TULA blog is informational and not medical advice. Always consult your doctor for health concerns. LIVE TULA doesn’t endorse specific tests, products, or procedures. Use the information at your own risk and check the last update date. Consult your healthcare provider for personalized advice.

